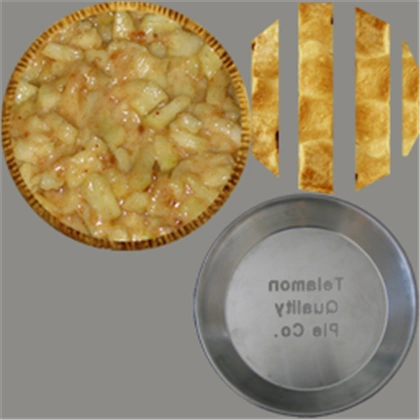
A simple Apple Pie texture.
This article should teach you how to retexture on ROBLOX. You'll want to have an image editing program; an item in mind you want to edit; and an active imagination.
A re-texture, retexture, reskin, or re-skin, is a mesh texture which has been altered by a user and reapplied to the mesh. Re-texturing alters the surface of a mesh but not its shape, due to the fact that it's the same mesh, but a different texture. Re-texturing is supported by the administrators of ROBLOX, and there is an Official Retexture Group that makes re-textures for ROBLOX.
Getting the Original Texture of an Object
For the purposes of this tutorial, we'll be using the Flaming Dragon Slayer Bo Staff's texture. The steps are as follows:
1: Either by owning the item or getting it from free models, insert the model into Studio (ROBLOX Studio). To insert the model to Studio, enter this into the Command Bar:
game.Workspace:InsertContent("http://www.roblox.com/asset/?id=73232786")
2: Open up the properties window (View>Properties) if it isn't already open. Click on the Mesh in the Explorer. The mesh is a child of the handle.
3: Type into the 'Search Properties' bar: "TextureId". A single result should appear.
4: Highlight only the numbers in the web address at the end (in this case, 72008530) and copy it (with either CTRL + C or by right clicking and selecting 'Copy' from the list.).
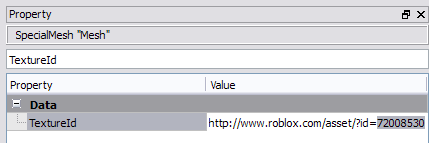
An example of the Id you need to copy.
5: You're done with Studio for now. Open up your internet browser and go to the Catalog on ROBLOX.
6: Click on an item. Any item. Then look at the address bar at the top of the page. Highlight the numbers at the end of the address and hit CTRL + V or right click and select 'Paste'. Hit enter.
7: You should now see the template of the object you want. If not, review the steps to see where you went wrong.
So now you have the template. Now what do you do with it? The possibilities are endless: the colors can be changed, designs can be slapped on... just about anything. Just remember: Do not draw on the white part of the image. Anything that isn't wrapped properly onto the mesh is ignored, so don't waste time making some elaborate texture for it in anticipation of adding new stuff to the mesh.
This is the part where you get in and get dirty. Right click on the image and select copy, and open up your favored image editing program (Paint.NET, Photoshop, GIMP, and more). Press CTRL + V to paste the image. It may look like just a bunch of random parts, but ROBLOX will 'wrap' it around the mesh. You may wish to compare the texture with the actual mesh to see where what lines up with whatever. Image editing programs usually have their own sites with tutorials for achieving specific effects, and as such, actually designing the retexture will not be discussed here.
Applying the Re-texture
Great, you have your retexture all set up! It's time to get back to ROBLOX and upload the retexture.
1: Go to the Build page listed on the banner and click on the 'Build New' button, and select 'Decal'.
2: Click on the 'Browse' button and find where you saved the retexture. Once you've found it, click on it, and then click on 'Create Decal'.
3: Click on your Inventory in the toolbar beneath the banner. Once you're in your inventory, click on 'Decals' in the list to the left.
4: Find the decal you have just uploaded. It will be grey with a black and white ROBLOX logo on it. That means it's pending review from a moderator. Don't worry about it for now. Click on it and look at the address bar. Highlight the numbers on the address and-- you guessed it-- hit CTRL + C (or the alternative).
5: Open up Studio. You'll need to insert the model you were creating a texture for.
6: Again, click on the mesh and search 'TextureId'. This time, however, highlight the numbers at the end of the address and hit CTRL + V.
7: Now here's the tricky part. The way ROBLOX handles decals in game makes it so that you MUST subtract 1 from the address number. For instance, if your address number is 123456789, you must subtract 1 from the end to come out with 123456788. If you don't do this, the object will be covered in a blurry checkerboard. There are uncommon cases when the asset Id is more than 1 away. If you still come up with the checkerboard, then continue subtracting 1 from the number until you get the desired image.
8: Observe the results. Don't be discouraged if it doesn't look that great: retexturing takes practice to get down.
Re-textured Apple Pie "Strawberry Pie Texture" by RangeMeludE
Trivia
This section is a trivia section. Please relocate any relevant information into other sections of the article.
- Users often criticize retextures when they are used as ROBLOX hats because the community wants ROBLOX to make new hats with different meshes.
- Unless one of the ROBLOX staff takes interest in your retexture and officially publishes it, it will be only for your game/model. Even if you can't take your sleek-looking futuristic crossbow into other places, it still looks cool in your own.
- The above instructions don't only apply to gears-- you can retexture hats, too!